Sahirow Shrine location and walkthrough in Zelda: Tears of the Kingdom
How to complete the Sahirow Shrine in Zelda: Tears of the Kingdom, including its location and the full “Aid From Above” puzzle solution.
This article references relevant content from the polygon.com website. Original article link: [https://www.polygon.com/zelda-tears-of-the-kingdom-guide/23716281/sahirow-shrine-solution-puzzle-chest]
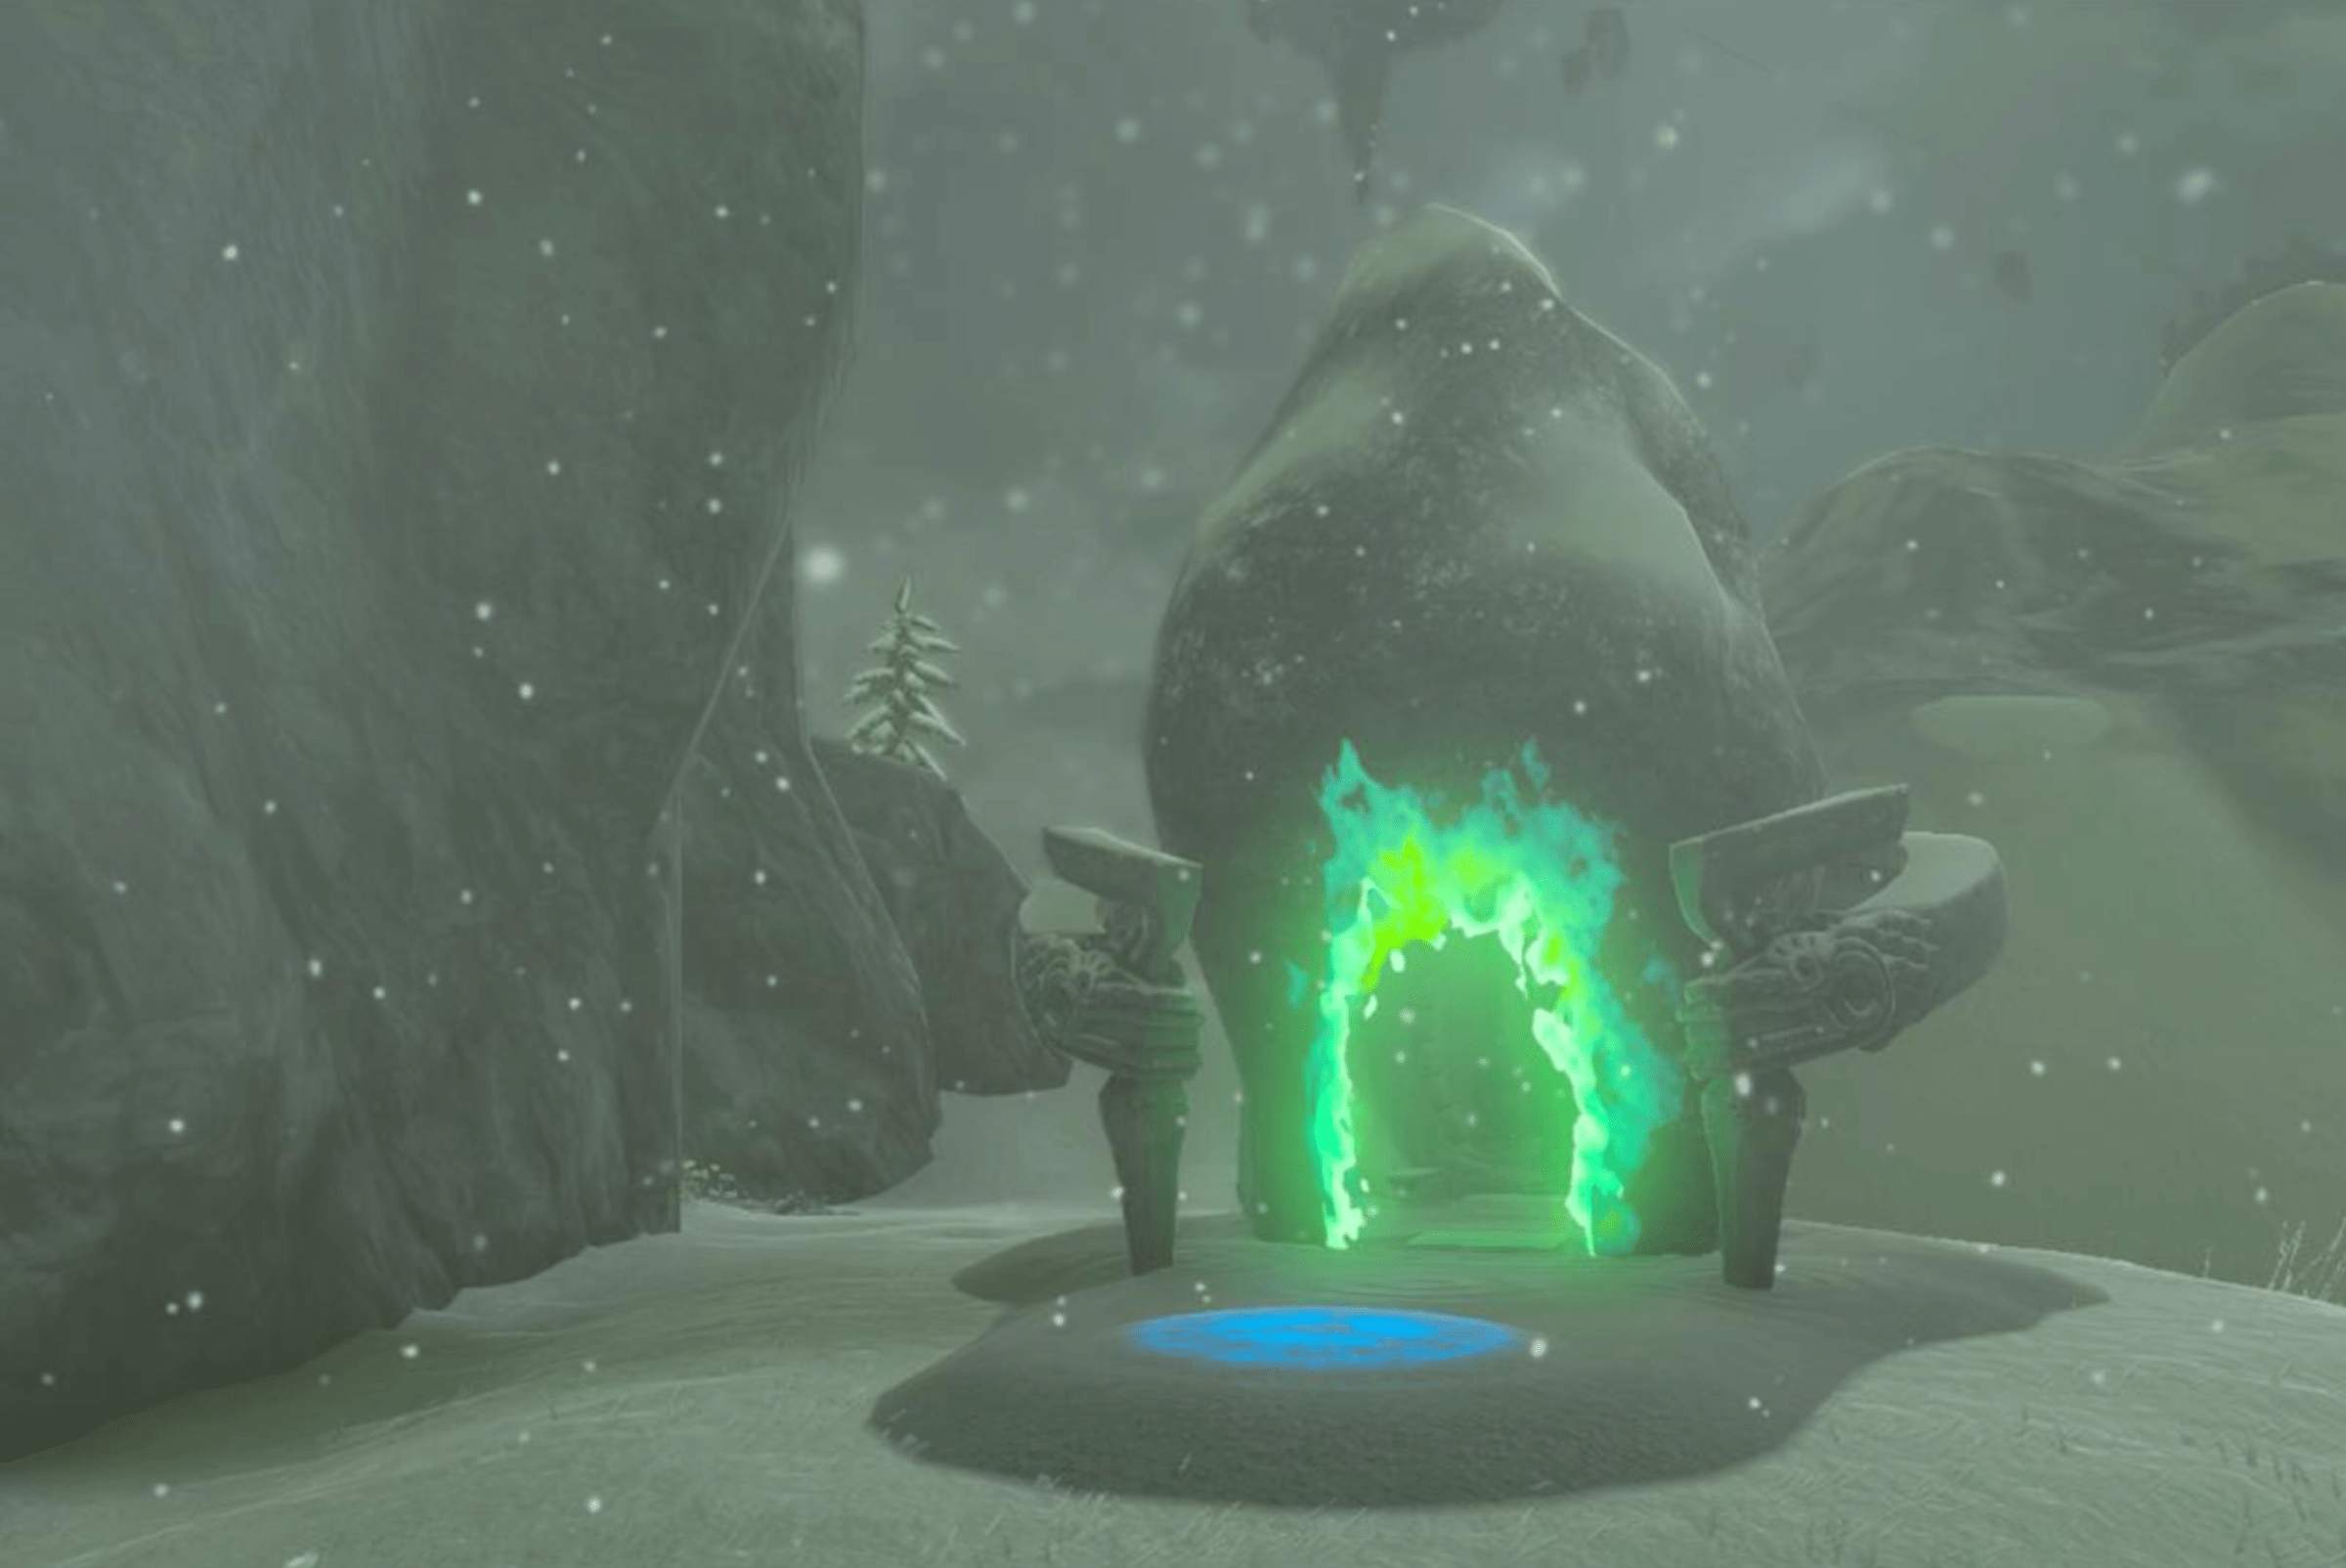
Sahirow Shrine is a shrine within The Legend of Zelda: Tears of the Kingdom’s Hebra Mountains.
Our guide will help you find the Sahirow Shrine location, solve its puzzles, and walk you through the “Aid From Above” puzzle to collect the chest and Light of Blessing.
When you’re done, our shrine locations page or interactive Hyrule map can direct you toward something else to do.
Sahirow Shrine location
Sahirow Shrine is found within the Hebra Mountains region. The shrine is located southwest of Hebra Peak. The shrine is easily accessible by either gliding down from a higher peak or climbing up from a valley. The exact coordinates are (-3355, 2387, 0361).
Sahirow Shrine walkthrough
Sahirow Shrine is stuffed to the brim with laser puzzles, but don’t let that scare you. Although various hallways look like they’ll send Link on a spy mission fit for Mission Impossible, many of the lasers can be avoided by crouching or jumping.
1. Start by running through the first hallway. You will encounter a red laser. Continue running through the hall and jump over it. If you hit the laser, a trap door will open under Link and he will restart at the front.
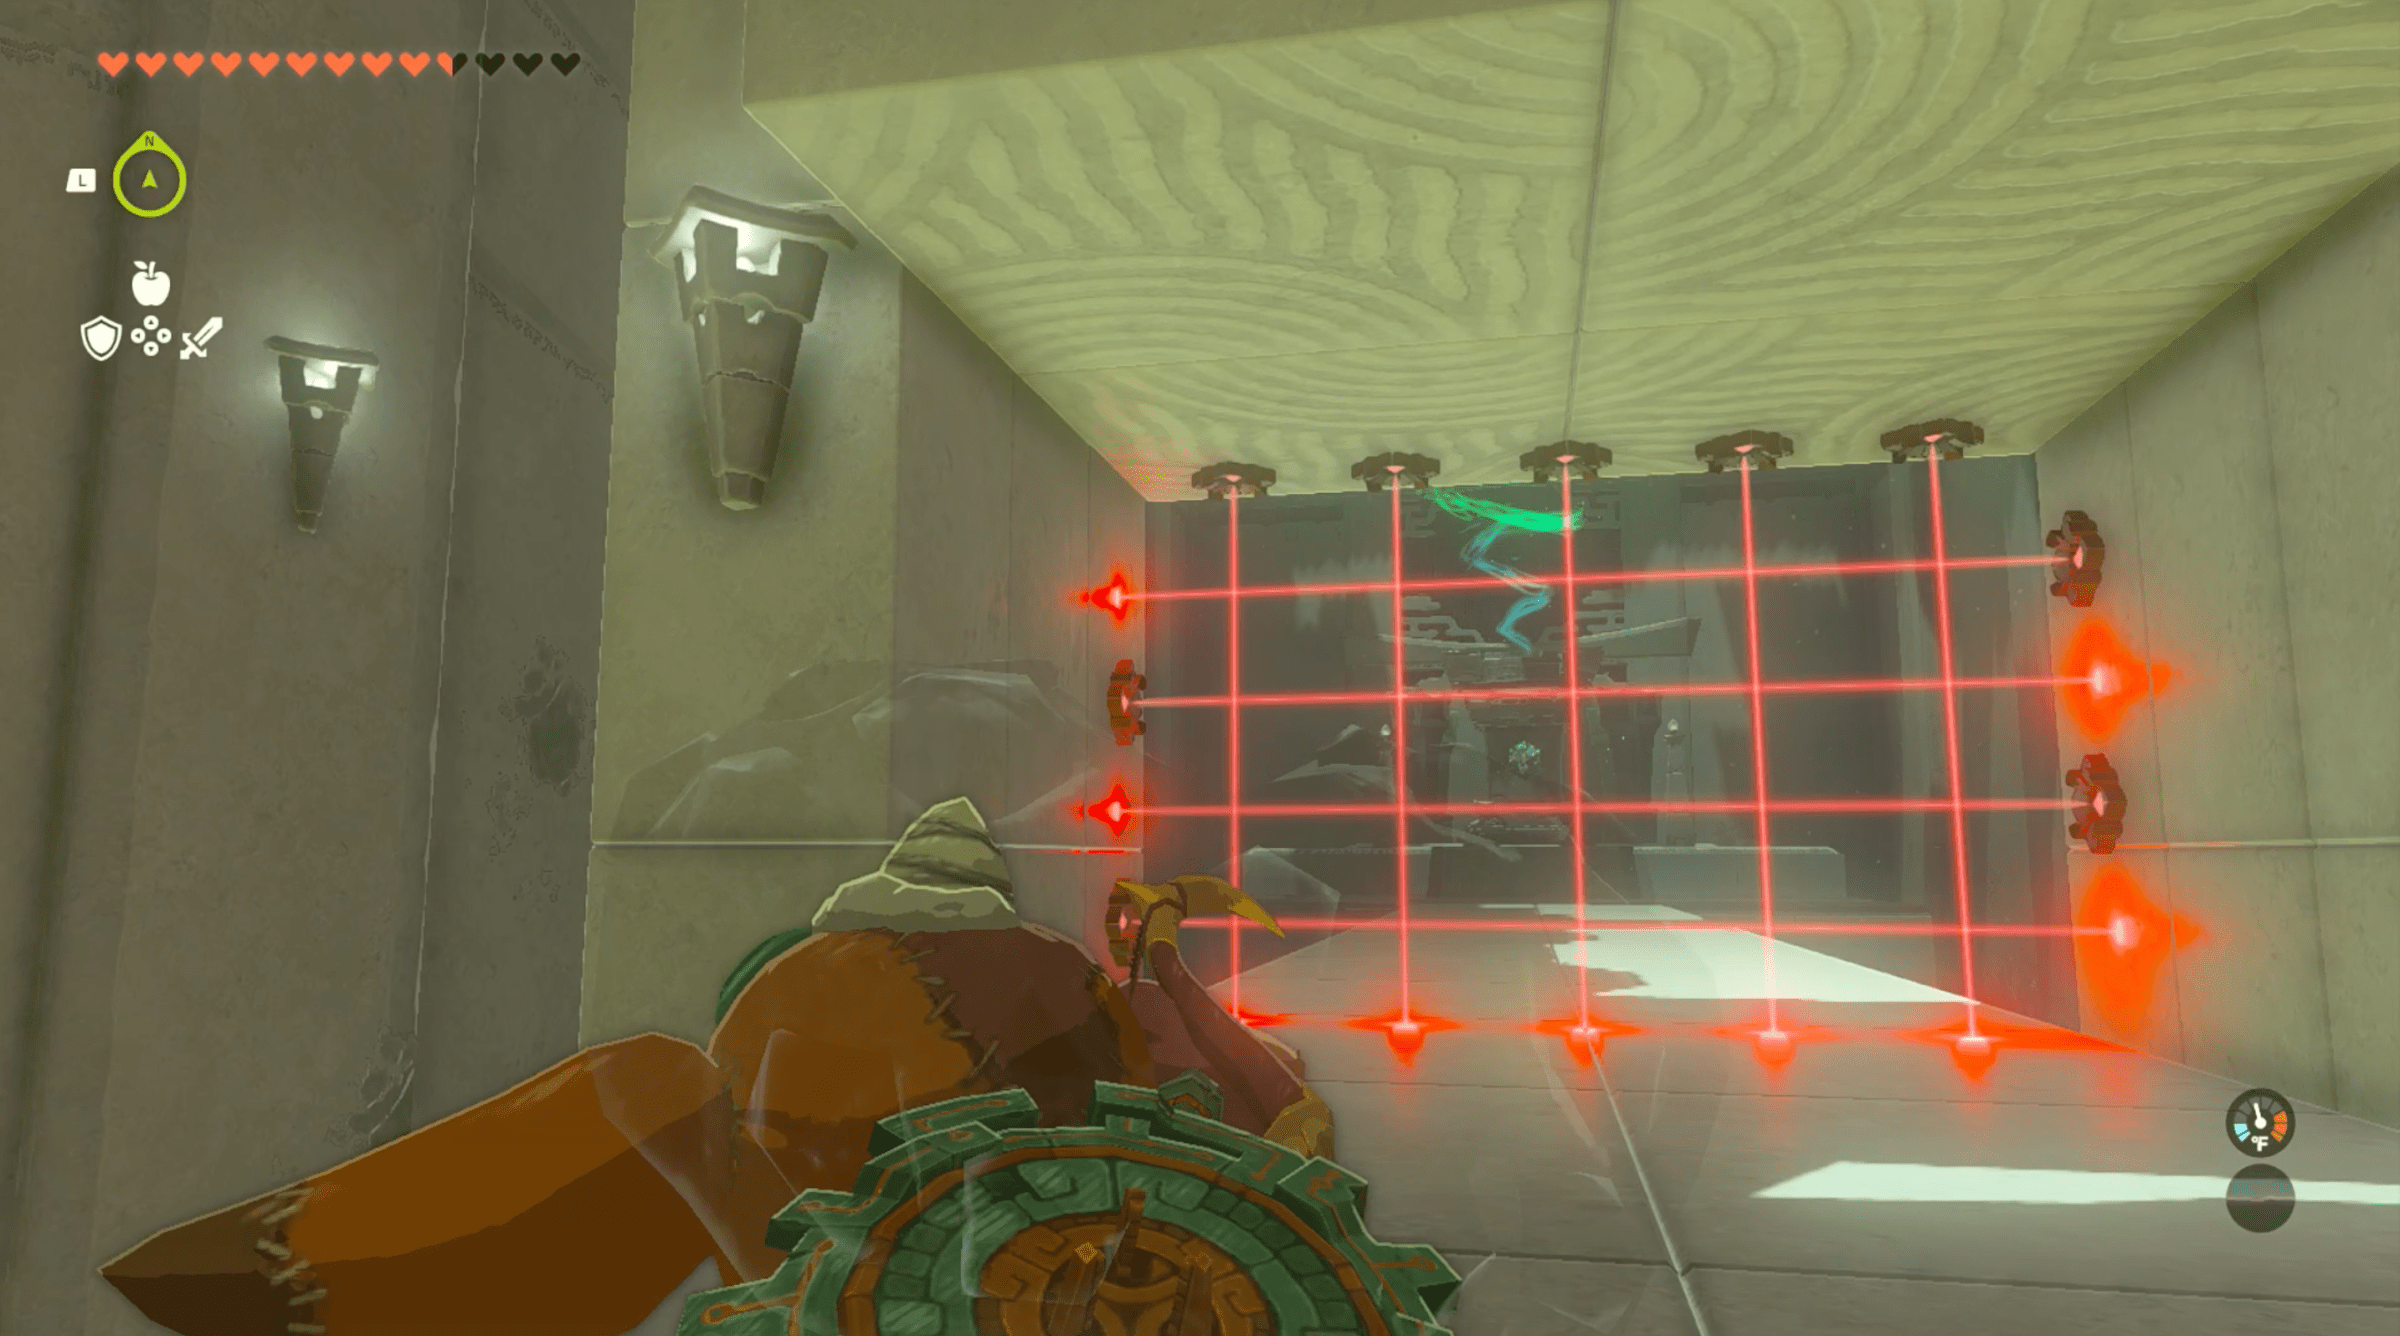
2. The next hallway has significantly more lasers to avoid. First, jump over the first laser.
3. Second, crouch and walk under the next four lasers. The first one runs parallel to the floor. It looks low, but Link’s crouch is low enough to avoid it. After that, keep walking while crouching under the next three, as shown below.

4. As you approach the other end, you will see a small raised platform on your right. Jump up onto the higher platform. From there you can jump and glide past the last three lasers.
5. Once you are at the end of the hallway past the lasers, look up. There is a platform moving above you. Use Ascend to jump up through it and bring Link to the next area.
6. At this point, there are two directions you can go: one looks like a long hallway and the other looks like a room guarded by a laser. Walk toward the laser and the room behind it to grab a chest.
7. Crouch under the laser to get past it and walk into the room.
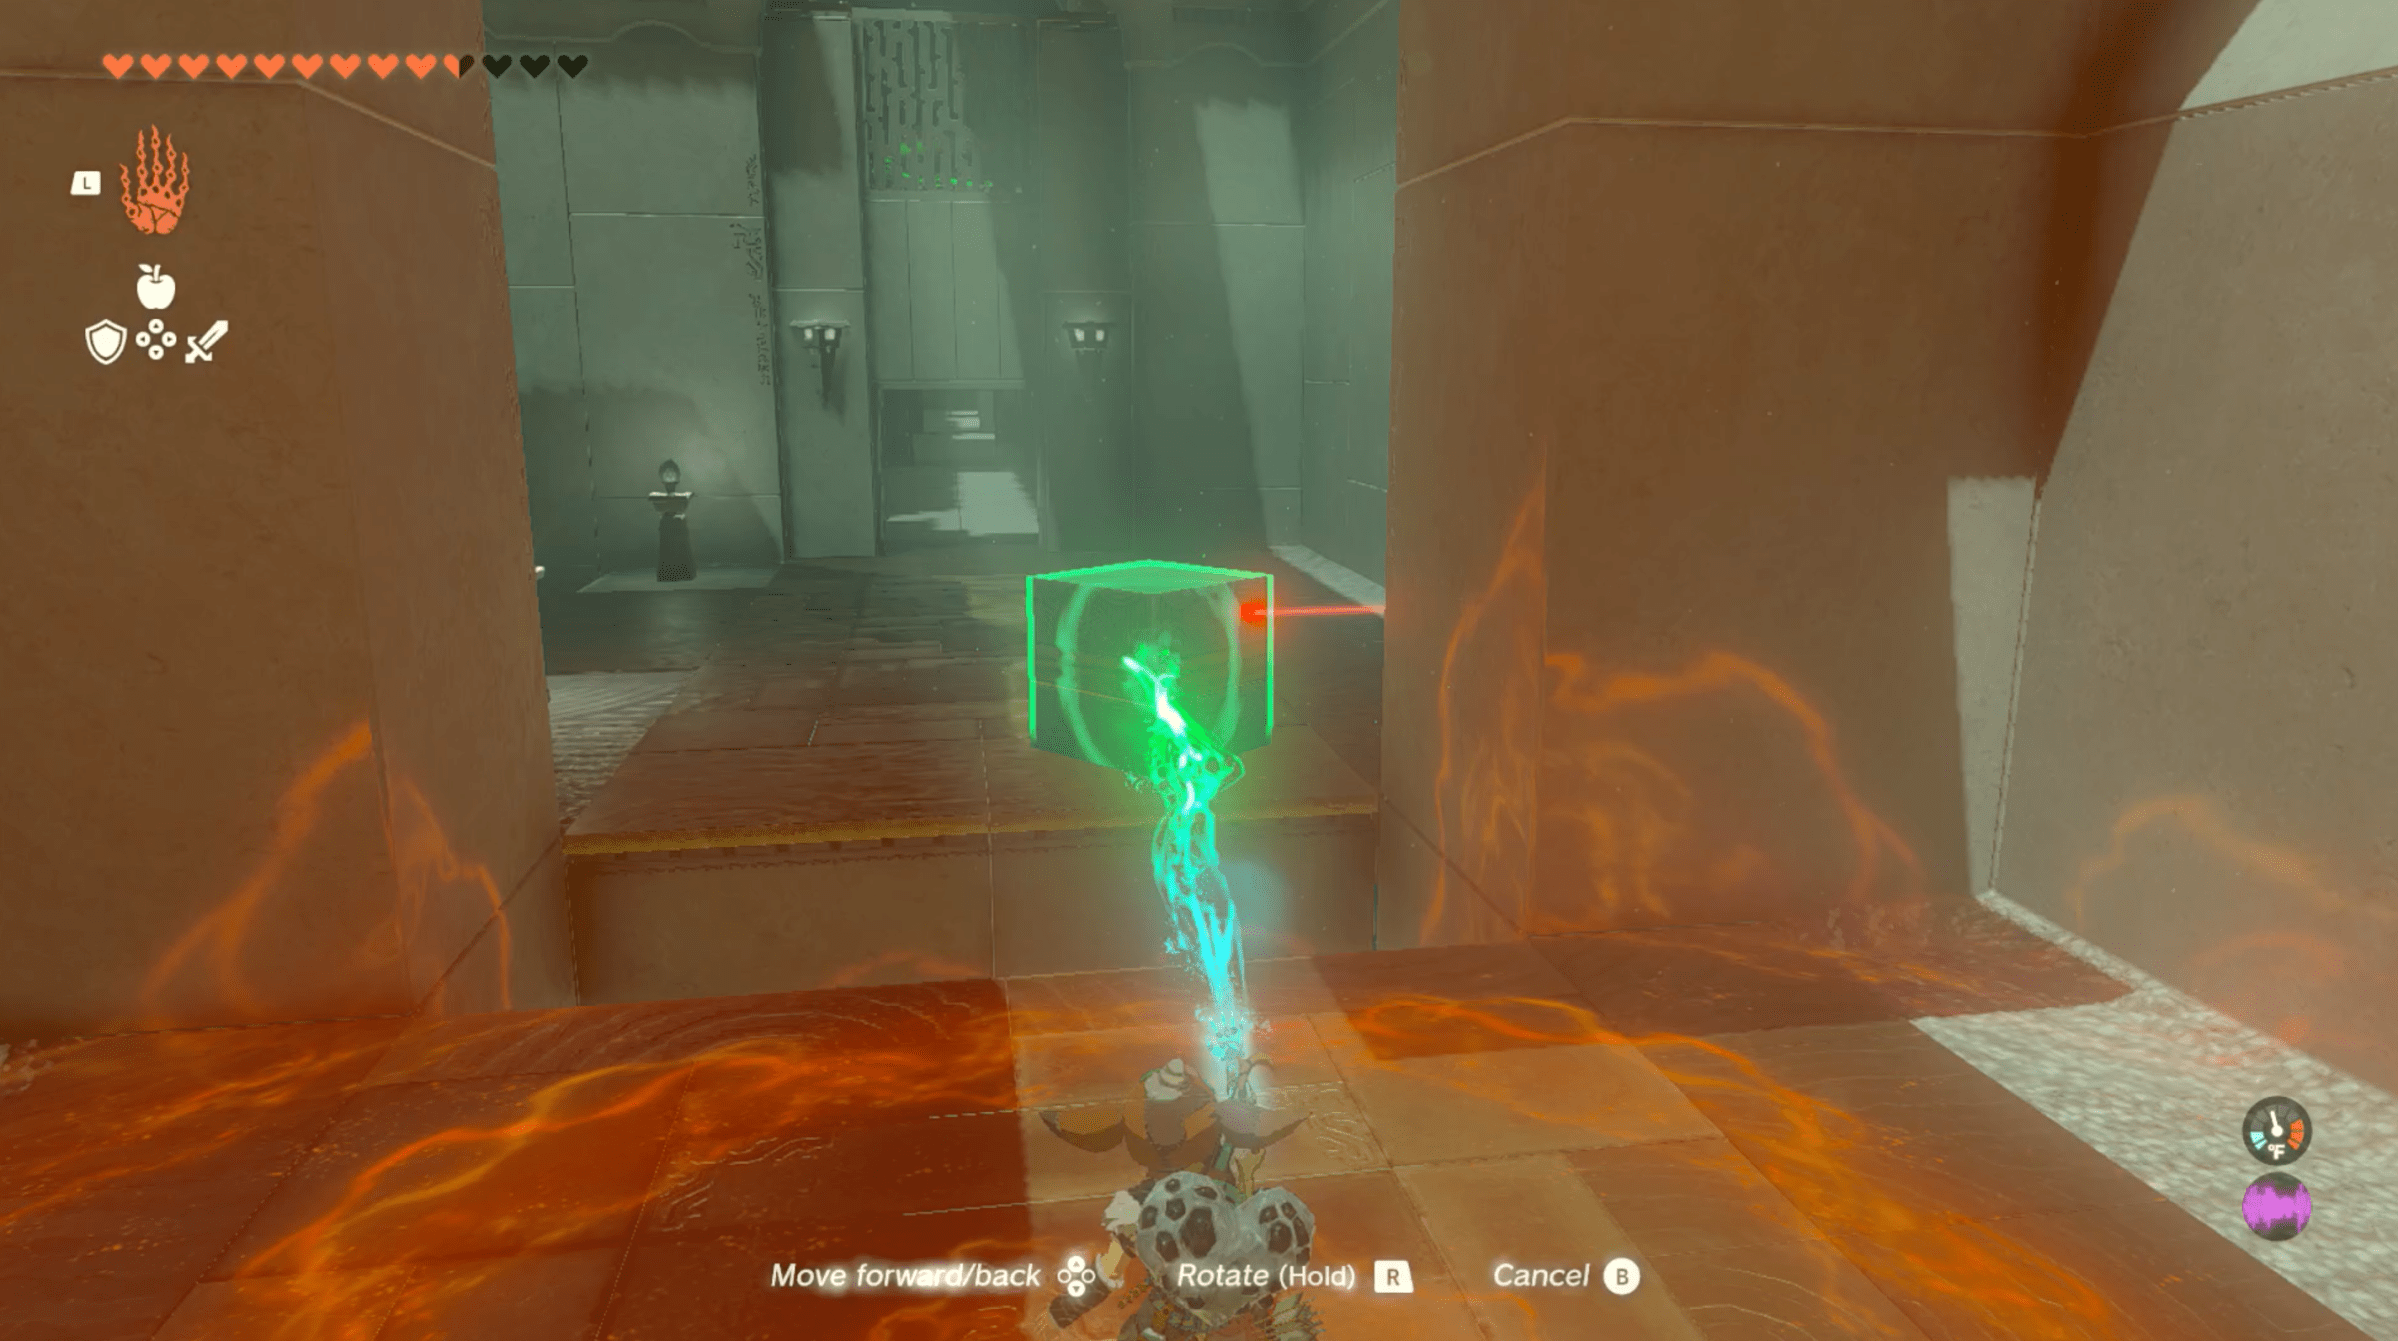
8. Once inside, you will see the chest behind big metal bars and two blocks. Use Ultrahand to grab one of the blocks, and position it so that it blocks the laser you just walked under.
9. Make sure to keep your distance when you do this. A trap door at the entrance of the room will open once you block the laser, as shown below.

10. Once you block the laser, the door to the chest will open. Walk in and grab the spicy elixir.
11. Now you need to get back. Use Ultrahand to remove the block obstructing the laser. Once you move it away, the trap door will become a regular path again and you can get past by crouching under the laser again.
12. Now that we’re back in the room with the split path, we will take the path that looks like a hallway. The next part is a series of hallways that have moving lasers.
13. You can’t see it at the start, but as you walk through the first hallway a laser will appear at the end and move towards you. Jump over it as it approaches you.
14. In the next hallway the same thing will happen. As you walk through, a laser will appear and move toward Link. This time, crouch to avoid the laser.
15. In the third hallway, you’ll see a giant laser wall approach that you can’t jump over or crouch under. Don’t panic — if you stay at the entrance of the room it can’t touch you. Wait for it to reach the end and reverse its path.
16. At this point, you can run towards it and use the Ascend ability to morph through the ceiling of the concrete platform containing the lasers.
17. Once on top of the moving platform, wait until it moves as close as possible to the final pedestal. Jump and glide over to the end of the shrine to collect your Light of Blessing.